
这可能是你需要的React实战技巧
一、父组件通过 Ref 调用子组件中的方法
这里同时演示使用函数组件和类组件的父子组件如何编写
子组件
React.forwardRefReact.useImperativeHandle- public、private、protected
/** * 声明一个 function component 作为子组件 * 通过 forwardRef 接收父组件传递的 ref * 通过 useImperativeHandle 改造原 ref * 同时定义类型 IFnChildInstance 明确返回的 ref 的类型(非 typescript 不用考虑这个) * 同时演示了组件的 props 应该写在哪里 */
interface IFnChildInstance {show: () => void
}
interface IFnChildProps {testname: string
}
const CompFnChild = React.forwardRef(function (props, ref
) {const { testname } = propsReact.useImperativeHandle(ref, () => ({show: () => setVisible(true),}))const [visible, setVisible] = React.useState(false)return (演示下state:{visible ? "显示" : "隐藏"}
演示下props:{testname}
setVisible(false)}>隐藏)
})/** * 声明一个 class component 作为子组件 * 通过 public 明确这就是我们希望父亲组件能调用的方法(public/private/protected) */
interface IClassChildProps {testname: string
}
interface IClassChildState {visible: boolean
}
class CompClassChild extends React.Component {constructor(props: IClassChildProps) {super(props)this.state = {visible: false,}}public show = () => {this.setState({visible: true,})}private handleHide = () => {this.setState({visible: false,})}render() {const { visible } = this.stateconst { testname } = this.propsreturn (演示下state:{visible ? "显示" : "隐藏"}
演示下props:{testname}
隐藏)}
}
父组件
React.useRefReact.createRef
function CompFnParent() {const RefFnChild = React.useRef(null)const RefClassChild = React.useRef(null)const myname = "tellyourmad"return (<> RefFnChild.current?.show()}> 调用 CompFnChild 的方法 ()private RefClassChild = React.createRef()componentDidMount() {// TODO}render() {const myname = "tellyourmad"return (<> this.RefFnChild.current?.show()}> 调用 CompFnChild 的方法 总结一下,其实使用 class 方式再配合上 typescript 编写的子组件其实是最能简洁明了的
二、memoize 的应用
get(computed)
平时我们有时候会用 get 对一些数据进行处理:
interface IMyTestProps {}
interface IMyTestState {firstname: stringlastname: string
}
class MyTest extends React.Component {get name() {const { firstname, lastname } = this.statereturn firstname + lastname}render(){return (我的名字是:{this.name})}
}
但是在每次触发 render 的时候都需要重新计算 get name,如果这里逻辑非常复杂,那将会消耗大量性能。其实很多时候我们只需要判断入参有没有发生变化即可判断是否需要重新计算。譬如例子中,如果 firstname 和 lastname 没有发生变化则不需要重新计算。
memoize
这里使用 memoize 包裹后:
import { memoize } from "lodash"interface IMyTestProps {}
interface IMyTestState {firstname: stringlastname: string
}
class MyTest extends React.Component {get url() {const { firstname, lastname } = this.statereturn this.getUrl(firstname, lastname)}private getUrl = memoize(function (firstname, lastname) {return firstname + lastname})render(){return (我的名字是:{this.name})}
}
- 这里用的是 lodash 库里面的方法,有兴趣可以自己去看源码
- 这种优化方式其实跟 debounce、throttle 都是一个意思,都是根据一定条件来判断是否应该节约本次计算
p.s. 这里只是演示了一个简单的 firstname + lastname 例子,实际是不需要考虑优化的,因为本身 memoize 也是要执行比较逻辑,当入参数非常复杂时,这样优化其实是得不偿失的,所以具体情况要具体分析。
三、实现一个弹窗组件(toast/modal/dialog)
你可以看到不管 antd(react) 还是 element(vue) 中的弹窗组件都是渲染在 document.body 上的,而非当前组件所对应的 render 节点上
import { Modal } from "antd"class Test extends React.Component {componentDidMount() {Modal.info({title: "通过api",visible: true,})}render() {return (测是是的话i说的参考 前端进阶面试题详细解答
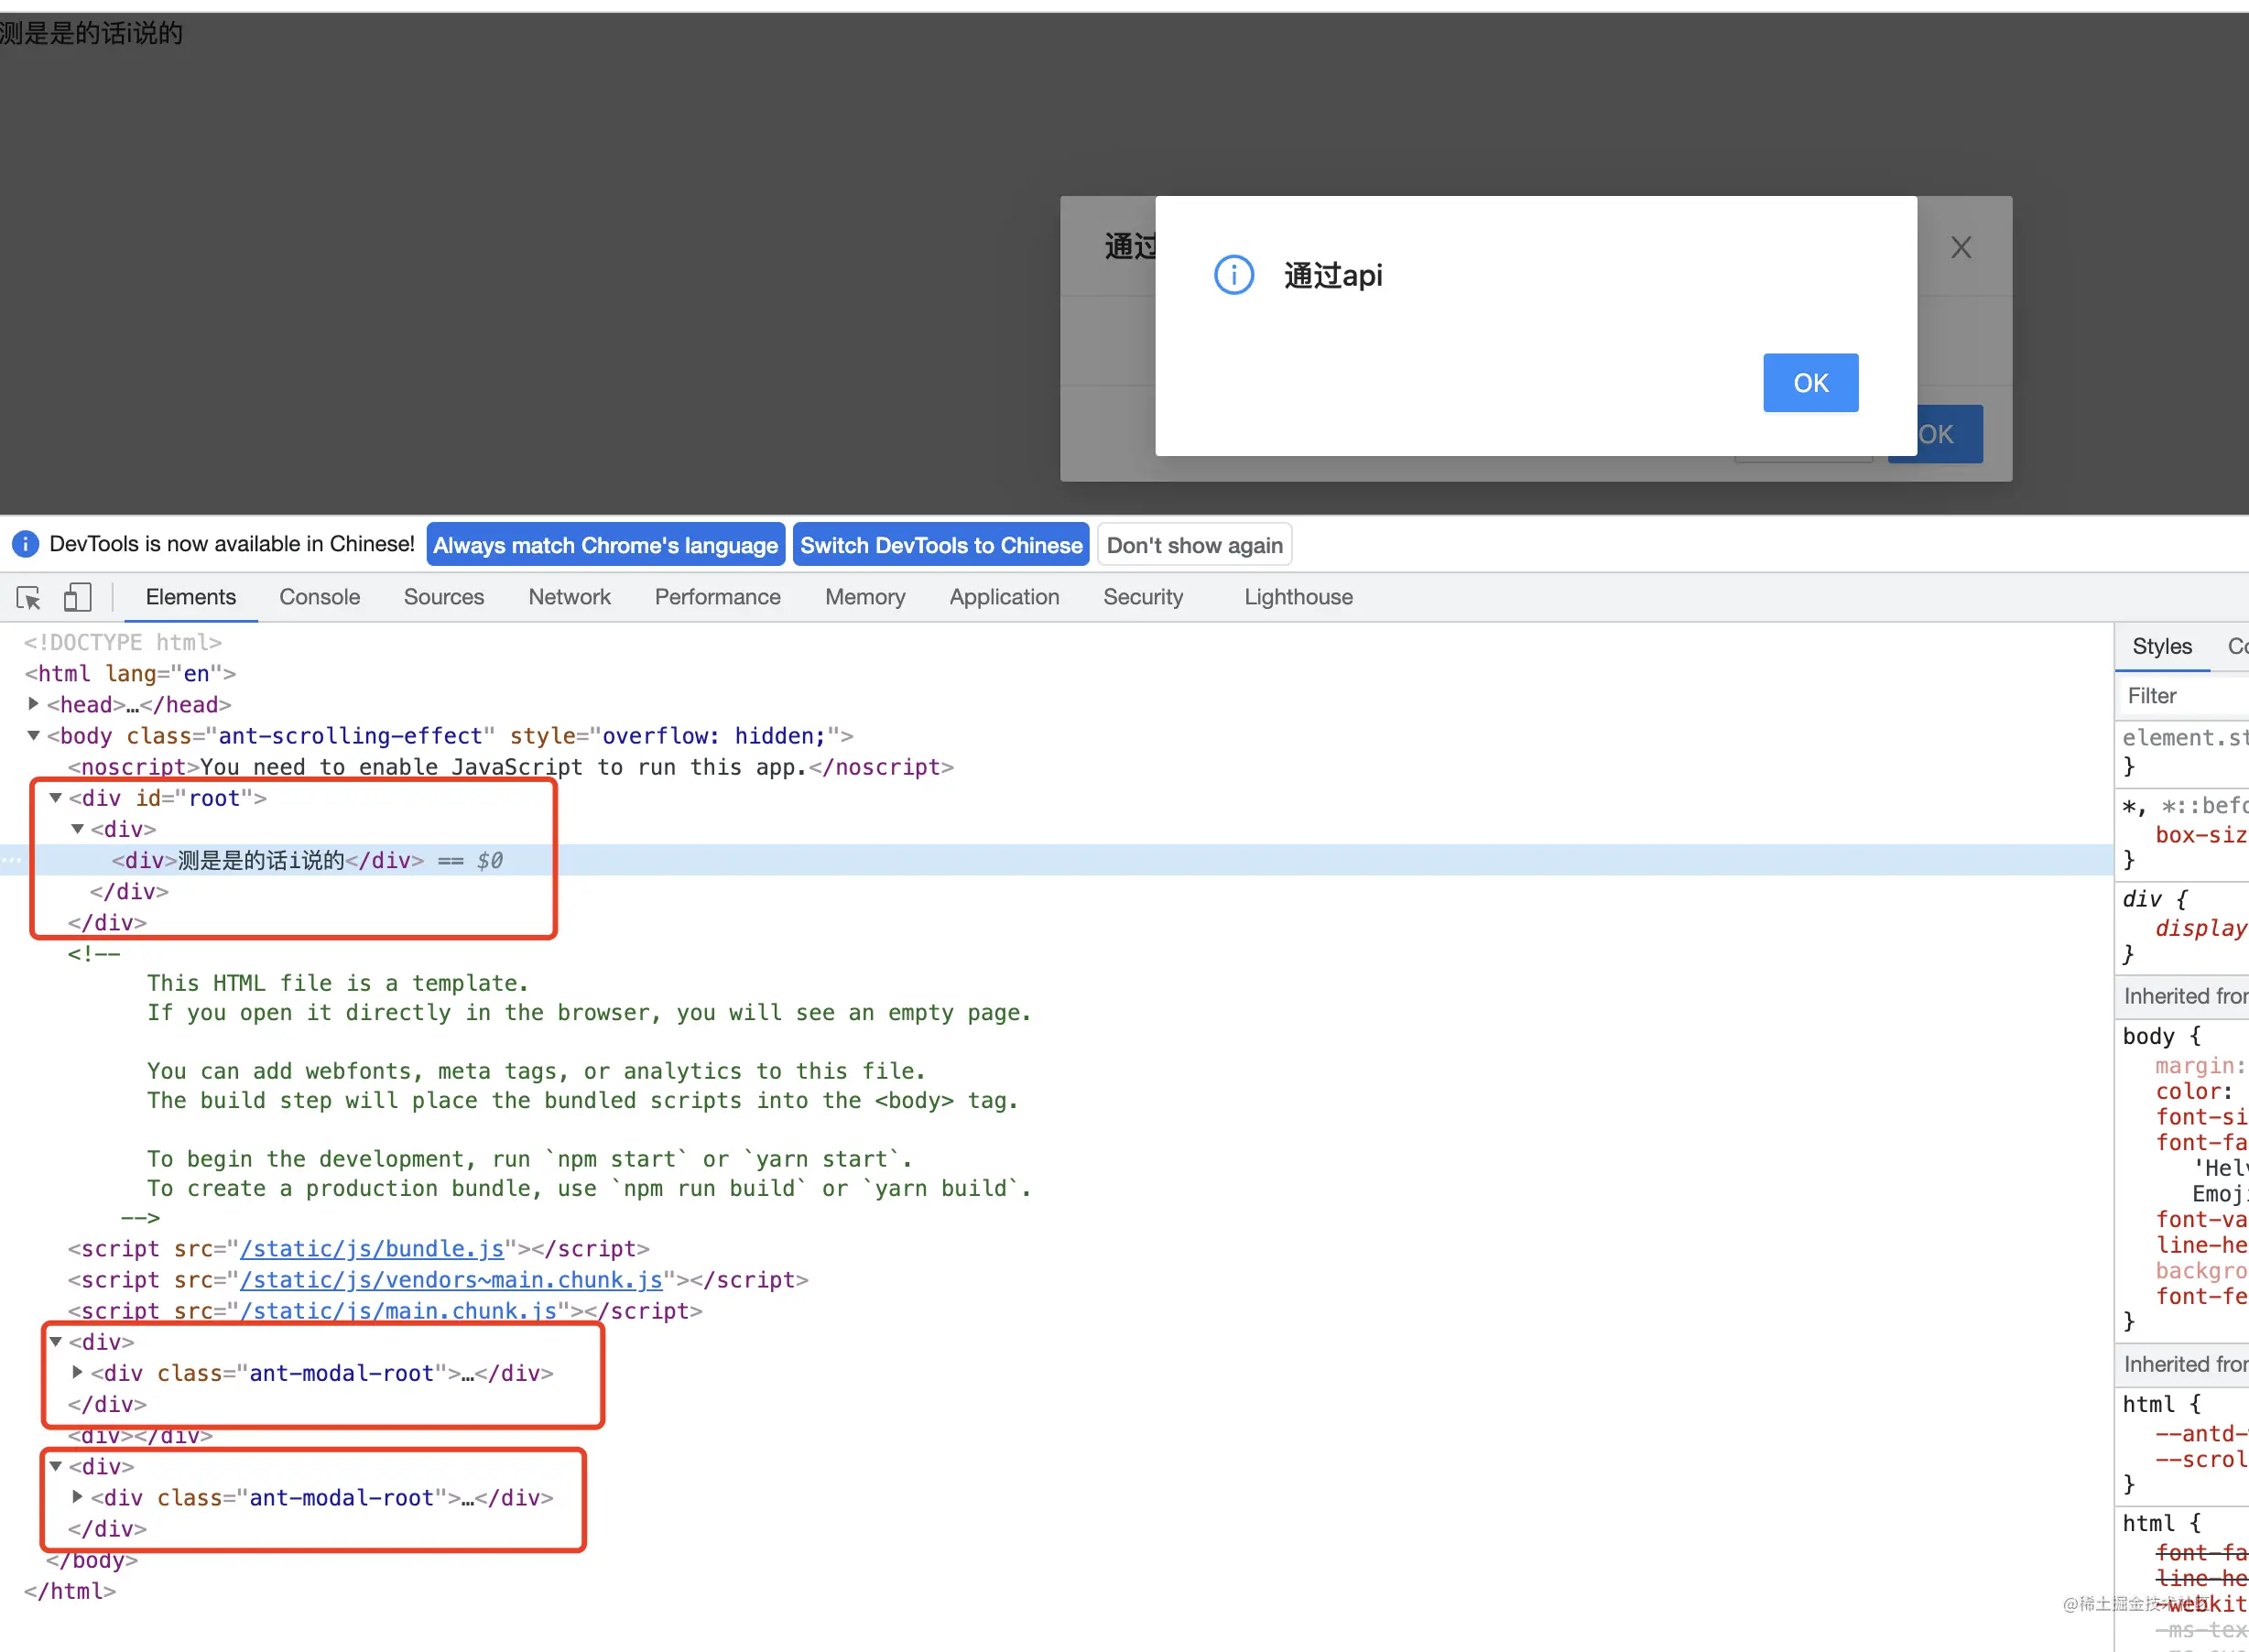
上面例子演示了两种弹窗使用方式,分别是 通过 api 调用 和 使用 react 组件,下面会逐个举例如何实现:
通过 api 调用
document.createElement创建 domdocument.body.appendChild插入 domReactDOM.render渲染组件- 调用实例中的方法 或者 直接给实例传递
import React from "react"
import ReactDOM from "react-dom"const show = function (props: IModalProps) {const node = document.createElement("div")document.body.appendChild(node)// 顺便说下,其实不必在这里写样式,没意义的// node.style.zIndex = "999";const handleClose = function () {/**     * 在 modal 关闭后会触发销毁     * 目前这里是 setState({visible: false}) 之后就立马触发销毁的     * 如果想 antd 那样还有消失过渡效果(transition)的话,还得加个延迟哦~     *     * p.s. 不销毁会导致性能等问题     */ReactDOM.unmountComponentAtNode(node) // 卸载 react 组件document.body.removeChild(node) // 删除 dom 节点}/**  ReactDOM.render(     {        props.onClose && props.onClose()        handleClose()      }}    />,    node  ).show() // render 之后调用实例中的 show 方法  **/// 因为在未来的 react 中,组件的渲染又可能是异步的,所以不建议直接使用 render 返回的实例,应该用下面方式ReactDOM.render( {        props.onClose && props.onClose()        handleClose()      }}    />,node,function(this: Modal) {this.show() // 在 callback 之后调用实例的方法})
}interface IModalProps {title: stringonClose?: () => void
}
interface IModalState {visible: boolean
}
class Modal extends React.Component {constructor(props: IModalProps) {super(props)this.state = {visible: false,}}// 暴露 show 方法public show = () => {this.setState({visible: true,})}private handleClose = () => {this.setState({visible: false,})this.props.onClose && this.props.onClose()}render() {return ({// 其他样式就应该不用演示了吧,就不写了 position: "absolute", zIndex: 999, left: 0, right: 0, top: 0, bottom: 0, visibility: this.state.visible ? "visible" : "hidden", }} >{this.props.title}关闭 通过调用 show 方法即可显示弹窗
使用 react 组件
ReactDOM.createPortal建立传送门- 通过
props控制
interface IModalProps {visible: booleantitle: stringonClose: () => void
}
class Modal extends React.Component {private el: HTMLDivElementprivate readonly container = document.bodyconstructor(props: IModalProps) {super(props)this.el = document.createElement("div")}componentDidMount() {this.container.appendChild(this.el)}componentWillUnmount() {this.container.removeChild(this.el)}private handleClose = () => this.props.onClose()render() {return ReactDOM.createPortal({// 其他样式就应该不用演示了吧,就不写了 position: "absolute", zIndex: 999, left: 0, right: 0, top: 0, bottom: 0, visibility: this.props.visible ? "visible" : "hidden", }} >{this.props.title}关闭 使用 react 组件
合体
我们的期望是这个 Modal 组件像 antd 的一样,既能通过 Modal.show() 方式使用,也是通过
const show = function (props: Omit) {const node = document.createElement("div")document.body.appendChild(node)const handleClose = function () {ReactDOM.unmountComponentAtNode(node)document.body.removeChild(node)}return ReactDOM.render( {        props.onClose && props.onClose()        handleClose()      }}    />,node).show()
}interface IModalProps {visible?: booleantitle: stringonClose?: () => void
}
interface IModalState {visible: boolean
}
class Modal extends React.Component {/** * 将 show 方法放到 class component 的静态方法中 */static show = showprivate el: HTMLDivElementprivate readonly container = document.bodyconstructor(props: IModalProps) {super(props)this.el = document.createElement("div")this.state = {visible: false,}}componentDidMount() {this.container.appendChild(this.el)}componentWillUnmount() {this.container.removeChild(this.el)}get visible() {/** * props 优先级比 state 高 * 保证如果外部在控制弹窗状态,则根据外部的来 */if (typeof this.props.visible !== "undefined") {return this.props.visible}return this.state.visible}public show = () => {this.setState({visible: true,})/** * return 当前实例,提供链式调用的操作方式 * 譬如: Modal.show().hide() */return this}public hide = () => {this.setState({visible: false,})return this}private handleClose = () => {this.setState({visible: false,})this.props.onClose && this.props.onClose()}render() {return ReactDOM.createPortal({// 其他样式就应该不用演示了吧,就不写了 position: "absolute", zIndex: 999, left: 0, right: 0, top: 0, bottom: 0, visibility: this.visible ? "visible" : "hidden", }} >{this.props.title}关闭 使用 api 调用
使用 react 组件
总结一下,最后的这个组件有多种实现方式,这里只是很简单的演示一下,关键点在你要掌握 ReactDOM.render 和 ReactDOM.createPortal 的使用,当你掌握了这两者,诸如 Toast、Dialog、Dropdown 大体都是一个实现原理。